The technique to reduce a posterior shoulder dislocation is similar to the widely used traction-countertraction method for anterior shoulder dislocations. Intra-articular anesthetic and procedural sedation are recommended, and an orthopedic surgeon should be consulted prior to reduction.
(See also Overview of Shoulder Dislocation Reduction Techniques, Overview of Dislocations, and Shoulder Dislocations.)
Indications for Reducing Posterior Shoulder Dislocations
Posterior dislocation of the shoulder
Reduction should be attempted soon (eg, within 30 minutes) after the diagnosis of an acute closed posterior shoulder dislocation is made. However, because posterior dislocations are rare, difficult to reduce, and frequently complicated by associated shoulder injuries (see Contraindications, below), consultation with an orthopedic surgeon prior to reduction is recommended.
An associated neurovascular deficit, which is uncommon with posterior shoulder dislocation, warrants immediate reduction.
Open dislocations require surgery, but closed reduction techniques and immobilization should be performed as interim treatment if the orthopedic surgeon is unavailable and a neurovascular deficit is present.
Diagnosis of a posterior shoulder dislocation often is made late (sometimes weeks to months after the inciting event). Delayed closed reduction attempts may be difficult and unsuccessful but are generally recommended (if the dislocation is < 3 weeks old) and should include generous procedural sedation and analgesia.
Contraindications to Reducing Posterior Shoulder Dislocations
Contraindications to simple closed reduction:
Greater tuberosity fracture with > 1 cm displacement
Reverse Hill-Sachs deformity (> 20% humeral head deformity due to impaction against glenoid rim)
Surgical neck fracture (below the greater and lesser tuberosities)
Bankart fracture (posterior-inferior glenoid rim) involving a bone fragment of over 20% and with glenohumeral instability
Proximal humeral fracture of 2 or more parts
These significant associated fractures require orthopedic evaluation and management, because of the risk of the procedure itself increasing displacement and injury severity.
Complications for Reducing Posterior Shoulder Dislocations
Neurovascular injuries, which are uncommon due to the anterior location of the neurovascular bundle
Fractures of the humeral head, glenoid rim, and greater and lesser tuberosities, due to forceful reductions and manipulations
Increased displacement of fractures and worsening of associated injuries
Dislocation arthropathy, adhesive capsulitis, stiffness, and chronic pain, which are consequences of late diagnosis more so than the reduction
Equipment for Reducing Posterior Shoulder Dislocations
A bed sheet
Intra-articular anesthetic: 20 mL of 1% lidocaine, 20-mL syringe, 5 cm (2-inch) 20-gauge needle, antiseptic solution (eg, chlorhexidine, povidone iodine), gauze pads
Materials and personnel required for procedural sedation and analgesia (PSA)
Shoulder immobilizer or sling and swathe
One or two assistants are needed.
Additional Considerations for Reducing Posterior Shoulder Dislocations
Because posterior shoulder dislocations are uncommon (1) and sometimes missed on initial presentation, obtain orthopedic consultation prior to reduction.
Findings on anteroposterior radiographs may be subtle. A scapular Y view or an axillary view radiograph should be performed. A CT scan should be performed if the dislocation is unclear on radiograph. CT may also be needed to diagnose a surgical neck fracture or other fracture or for surgical planning.
Procedural sedation and analgesia (PSA) is often needed.
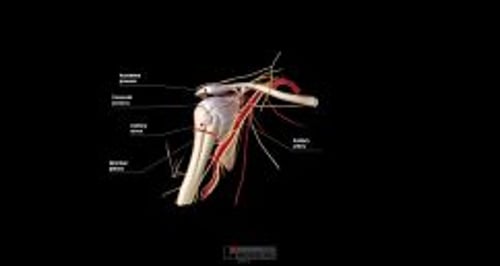
Relevant Anatomy for Reducing Posterior Shoulder Dislocations
The dislocated humeral head may be trapped against the posterior lip of the glenoid fossa; thus, reduction requires distraction as well as repositioning of the humeral head.
Positioning for Reducing Posterior Shoulder Dislocations
Position the patient supine on the stretcher. Raise the stretcher to the level of your pelvis; lock the wheels of the stretcher.
Stand at the patient’s affected side at the level of the patient’s abdomen.
Have an assistant stand on the opposite side, cephalad to the patient’s shoulder level.
Step-by-Step Description for Reducing Posterior Shoulder Dislocations
Neurovascular examination
Perform a pre-procedure neurovascular examination of the affected arm, and repeat the examination after each reduction attempt. Generally, testing motor function is more reliable than testing sensation, partly because cutaneous nerve territories may overlap. Assess the following:
Distal pulses, capillary refill, cool extremity (axillary artery)
Light touch sensation of the lateral aspect of the upper arm (axillary nerve), thenar and hypothenar eminences (median and ulnar nerves), and dorsum of the 1st web space (radial nerve)
Shoulder abduction against resistance, while feeling the deltoid muscle for contraction (axillary nerve): However, if this test worsens the patient's pain, omit it until after the shoulder has been reduced.
Thumb-index finger apposition ("OK" gesture) and finger flexion against resistance (median nerve)
Finger abduction against resistance (ulnar nerve)
Wrist and finger extension against resistance (radial nerve)
Analgesia
Administer intra-articular injection of local anesthetic and procedural sedation and analgesia (PSA). To administer intra-articular analgesia:
The needle insertion site is approximately 2 cm inferior to the lateral edge of the acromion process (into the depression created by the absence of the humeral head).
Swab the area with antiseptic solution, and allow the antiseptic solution to dry for at least 1 minute.
Optional: Place a skin wheal of local anesthetic (≤ 1 mL) at the site.
Insert the intra-articular needle perpendicular to the skin, apply back pressure on the syringe plunger, and advance the needle medially and slightly inferiorly approximately 2 cm.
If any blood is aspirated from the joint, hold the needle hub motionless, switch to an empty syringe, aspirate all of the blood, and re-attach the anesthetic syringe.
Inject 10 to 20 mL of anesthetic solution (eg, 1% lidocaine).
Wait for analgesia to occur (up to 15 to 20 minutes) before proceeding.
Administer procedural sedation and analgesia.
Reduce the shoulder — Posterior dislocation
Wrap a sheet around the patient’s upper torso, passing the sheet under the axilla of the dislocated shoulder, and tie the ends of the sheet around the hips of the assistant standing at the opposite side of the stretcher. Wrap the sheet around the assistant’s hips (instead of the waist) to help prevent back strain.
After the patient is in position, and while applying traction, fully abduct and internally rotate the affected arm to assist in disengaging the humeral head from the glenoid rim.
Have the assistant on the opposite side of the body lean backward against the sheet to create countertraction while you manually apply axial traction to the arm.
Have a second assistant push upward (anteriorly) on the posterior aspect of the humeral head.
If needed (if the humeral head is locked on the posterior glenoid), the second assistant can also manually apply a gentle lateral force to the upper humerus, to leverage the humeral head laterally towards the glenoid fossa.
Once the humeral head is dislodged, apply slight external rotation to complete the reduction.
If there is muscle spasm or the patient resists the procedure, administer more analgesic and/or sedative medications.
The first signs of a successful reduction may include a lengthening of the arm, a perceptible “clunk,” and brief deltoid fasciculation.
If multiple attempts to reduce the shoulder have failed, perform reduction (closed or open) in the operating room with the patient under general anesthesia.
Aftercare for Reducing Posterior Shoulder Dislocations
Successful reduction is preliminarily confirmed by restoration of a normal round shoulder contour, by decreased pain, and by the patient's renewed ability to reach across the chest and place the palm of the hand upon the opposite shoulder.
Immobilize the shoulder in external rotation (20°) and with slight abduction, using a sling and swathe or with a shoulder immobilizer.
Because the joint can spontaneously dislocate after successful reduction, do not delay immobilizing the joint.
Perform a post-procedure neurovascular examination. A neurovascular deficit warrants immediate orthopedic evaluation.
Perform post-procedure radiographs to confirm proper reduction and identify any coexisting fractures.
Arrange orthopedic follow-up.
Warnings and Common Errors for Reducing Posterior Shoulder Dislocations
Posterior shoulder dislocations may occur bilaterally (eg, during a seizure); in such a situation, a bilateral symmetry of physical findings may obscure the dislocations.
Apparent shoulder dislocation in a child is often a fracture involving the growth plate, which tends to fracture before the joint is disrupted.
Tips and Tricks for Reducing Posterior Shoulder Dislocations
Adequate sedation and analgesia is paramount given the discomfort with the procedure.
In patients who return with increased pain within 48 hours after a reduction, hemarthrosis is likely (unless the shoulder has again dislocated). Aspirate the blood from the joint space (see How to Do Arthrocentesis of the Shoulder).
Reference
1. Rouleau, DM, Hebert-Davies J, Robinson, CM . Acute traumatic posterior shoulder dislocation. J Am Acad Orthop Surg. 22(3):145-152, 2014.
Drug Information for the Topic