In lumbar puncture (LP), a needle is inserted into the lumbar subarachnoid space to collect cerebrospinal fluid (CSF) for laboratory testing, to measure CSF pressure, and sometimes to give intrathecal diagnostic or therapeutic agents.
When it is difficult to palpate landmarks (eg, because of obesity), lumbar puncture can be done by a radiologist using fluoroscopic guidance. Ultrasound can also be used to identify landmarks and, less commonly, to guide needle placement in real time if equipment and personnel are available. However, ultrasound is still not commonly used outside of teaching centers.
(See also Lumbar Puncture, Overview of Meningitis, and Subarachnoid Hemorrhage.)
Indications for Lumbar Puncture
Diagnostic indications*
Suspected central nervous system (CNS) infection (acute bacterial meningitis, viral meningitis, encephalitis, subacute or chronic meningitis)
Suspected CNS inflammatory conditions, including multiple sclerosis (or other CNS demyelinating conditions such as NMO or MOGAD), autoimmune encephalitis (eg, anti-NMDAR encephalitis), and sarcoidosis
Suspected spontaneous subarachnoid hemorrhage not diagnosed on neuroimaging or if immediate neuroimaging is not available
Suspected idiopathic intracranial hypertension
Suspected intracranial hypotension
Other CNS conditions, including Guillain-Barré syndrome, leptomeningeal metastases (carcinomatous meningitis), genetic metabolic encephalopathies
To give a radiopaque contrast agent for myelography
* Decide in advance what information you need from the lumbar puncture and what tests you need to order. Confirm requirements for any unusual tests with the clinical laboratory before starting the procedure.
Therapeutic indications
Reduction of intracranial pressure in idiopathic intracranial hypertension
Administration of intrathecal medications (eg, spinal or epidural anesthesia, intrathecal chemotherapy)
Contraindications for Lumbar Puncture
Absolute contraindications
Suspected infection (eg, cellulitis, abscess) at or near the site of needle insertion: If possible, use an alternate, uninfected site. This involves a suboccipital (cisternal) or cervical (C1-C2) approach and is always done under fluoroscopic guidance.
Relative contraindications
Suspicion of increased intracranial pressure due to an intracranial mass (eg, tumor, brain abscess, or blood, especially if in the infratentorial space) that could precipitate transtentorial or cerebellar herniation* following lumbar puncture. If there are suggestive findings (eg, focal neurologic deficits, altered mental status, papilledema, signs of herniation), do CT or MRI before lumbar puncture. (However, risk of herniation cannot always be predicted by CT or MRI.)
Coagulopathy (eg, international normalized ratio [INR] >1.5, including therapeutic anticoagulation; thrombocytopenia [< 50,000/mcL, 50 × 109/L], or pathologically increased activated partial thromboplastin time), which can lead to spinal hematoma from lumbar puncture: Consider correcting prior to procedure.†
Cardiopulmonary insufficiency or respiratory distress, which can be exacerbated by recumbent positioning during lumbar puncture
Anatomic abnormalities at the insertion site (eg, spinal fusion, laminectomy, congenital anomalies)
Bacteremia has not been shown to predispose to meningitis after lumbar puncture and thus is not a contraindication.
* When lumbar puncture is deferred, begin treatment of suspected acute bacterial meningitis or subarachnoid hemorrhage immediately. For meningitis, also do blood cultures immediately.
† Therapeutic anticoagulation (eg, for pulmonary embolism) increases the risk of bleeding with lumbar puncture, but this must be balanced against the increased risk of thrombosis (eg, stroke) if anticoagulation is reversed. If time permits, discuss any contemplated reversal with the clinician managing the patient's anticoagulation.
Complications of Lumbar Puncture
Bleeding into the epidural space (spinal hematoma)
Lower back discomfort or pain that may radiate to the posterior legs (self-limited)
Epidermoid tumor, which occurs years after lumbar puncture; risk is increased if the spinal needle is inserted or withdrawn with the stylet absent (very rare)
Brain herniation (rare)
Cortical blindness (rare)
Cervical spinal cord infarction (rare)
Transient or permanent deafness (rare)
Iatrogenic infection (rare)
Transient nausea and/or tinnitus
Intracranial hypotension due to CSF leak (rare)
Cranial nerve VI palsy (rare)
Headache develops after lumbar puncture in about 10% of patients, usually hours to a day or two afterward, and can be severe. Younger patients with a small body mass are at greatest risk. Using narrower, cutting (beveled-tip), or noncutting (pencil-point tip) needles reduces risk. Neither the amount of CSF removed nor a period of recumbency after lumbar puncture affects incidence.
Equipment for Lumbar Puncture
In many centers, prepackaged lumbar puncture kits are available. If not, necessary equipment includes the following:
Sterile gloves, gown, face mask, and cap
Sterile drapes and/or towels
Sterile gauze (eg, 10 cm × 10 cm [4" × 4"] squares)
Spinal needle with stylet: Cutting needle (beveled-tip) or noncutting (atraumatic) needle* (pencil-point tip); 20 or 22* gauge; 9-cm-long for adults, 6 cm for children, 4 cm for infants
4 CSF collection tubes (labeled 1 through 4) for laboratory studies; additional tubes if large-volume CSF collection is needed (eg, 30 to 40 mL) or additional special tests are needed. Large volumes of 30 to 40 mL of CSF may need to be collected when chronic meningitis (eg, tuberculous or fungal meningitis) or carcinomatous meningitis is suspected. Additional tubes (enough to contain 30 to 40 mL of CSF) may also be needed if a high-volume LP is planned for diagnosis of normal pressure hydrocephalus.
Manometer and stopcock; optionally, short extension tubing
Adhesive bandage
* Use of noncutting (pencil-point tip) needles, cutting (beveled-tip) needles, and smaller caliber (ie, 22-gauge) needle reduces risk of post-lumbar puncture headache.
For ultrasonographic guidance:
Bedside ultrasound device with a high-frequency linear array probe
Additional Considerations for Lumbar Puncture
If needed, draw blood for blood glucose to compare with CSF glucose; blood for oligoclonal bands can be collected at the same time.
Although ultrasonographic guidance can increase success rates and decrease complication rates in certain settings (1), routine use of ultrasound in emergency medicine to localize anatomical landmarks has not been shown to have these benefits (2).
References
1. Soni NJ, Franco-Sadud R, Schnobrich D, et al: Ultrasound guidance for lumbar puncture. Neurol Clin Practice 6(4):358-368, 2016. doi: 10.1212/CPJ.0000000000000265
2. Peterson MA, Pisupati D, Heyming TW, et al: Ultrasound for routine lumbar puncture. Acad Emerg Med21(2):130-136, 2014. doi: 10.1111/acem.12305
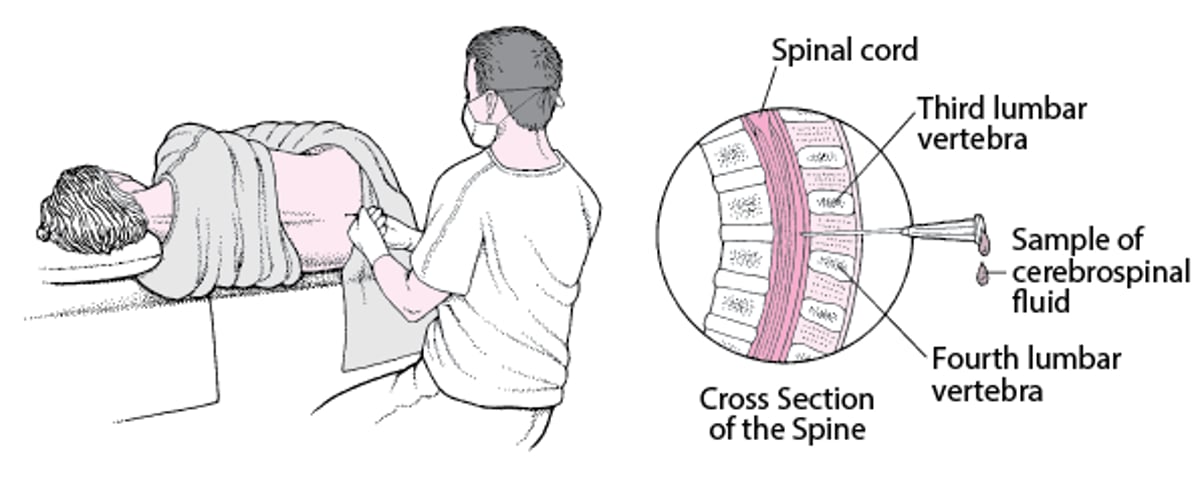
Relevant Anatomy for Lumbar Puncture
The desired insertion point of the needle is the L3-L4 or L4-L5 interspace; thus, the needle is inserted below the level of the spinal cord.
The spinous process of L4 lies along an imaginary line between the top of the posterior superior iliac crests.
Because the spinal cord ends at approximately T12-L1, the LP can theoretically be done as high up as L2 without risk of spinal cord injury.
In a midline insertion (most common approach), the spinal needle first traverses the supraspinous and interspinous ligaments between the vertebral spinous processes, before reaching the ligamentum flavum.
A lateral insertion (eg, 1 cm both lateral and caudad to the midline skin insertion point) bypasses the midline ligaments and may facilitate lumbar puncture in older patients whose ligaments are calcified and sclerotic.
The ligamentum flavum is thick connective tissue, and a distinct pop may (or may not) be palpable when the needle traverses it.
The needle then passes through epidural space (fat tissue and internal vertebral venous plexus) and then may palpably pop—again—through the dura mater (and simultaneously through the adjacent subarachnoid membrane) to enter the subarachnoid space (CSF space). Note that in many cases, no "pop" can be appreciated.
In children or infants, whose fibrous tissue offers little resistance to penetration, a pop may not be palpable as the needle passes the ligamentum flavum or dura.
Positioning for Lumbar Puncture
The goal is to flex the lumbar spine to expand the intervertebral spaces. The patient may either lie in the lateral decubitus position or be seated. The lateral decubitus position is generally preferred and should be used if CSF manometry is desired. The sitting position may be helpful for patients in whom physical landmarks are difficult to palpate in a lying position (eg, those with obesity); it is the preferred position for infants.
Lateral decubitus position: The patient lies on the side in a fetal position, with the hips flexed as much as is tolerable. Ensure the pelvis, back, and shoulders are perpendicular to the bed. Place a pillow under the head to align the head with the spine and between the knees for comfort if needed. An assistant can help the patient curl up as much as possible. Before beginning, assume a comfortable position close to the patient.
Sitting position: The patient sits at the edge of the bed with their feet on a stool or chair to flex the hips, and leans forward with the head and shoulders resting on a bedside table.
For an infant, an assistant holds the arms and legs from the front, maintaining the infant in a sitting fetal position on the bed. The head is also supported to prevent asphyxiation due to neck flexion.


GARO/PHANIE/SCIENCE PHOTO LIBRARY
Step-by-Step Description of Lumbar Puncture
Identify and prepare the site
Place the patient in proper position, using an assistant if needed.
Identify the needle-insertion site clinically: Palpate the lumbar vertebral spinous processes to identify the one closest to an imaginary line between the top of the superior posterior iliac crests; the closest spinous process is usually L4 (sometimes L3 in women). The insertion point is the depression just caudal to this spinous process (ie, in the L3-L4 interspace for the L4 process). Mark the site with a skin-marking pen. Although the L3-L4 interspace is the usual insertion site, the L4-L5 or L2-L3 interspace is acceptable.
For children, apply topical skin anesthetic and allow time for it to take effect.
Swab the insertion site with antiseptic solution using a series of expanding concentric circles that reach about 20 cm diameter.
Place sterile equipment on a sterile equipment tray and cover with a sterile drape.
Don sterile gloves. If you have any respiratory symptoms, wear a face mask. If isolation protocols are in place, wear a gown, face mask, and cap.
Assemble the manometer, stopcock, and short connecting tubing. The short connecting tubing allows some free motion, helping to prevent unexpected movement of the connected apparatus (eg, if the patient unexpectedly moves) from dislodging the needle.
Ensure smooth working motion of the stopcock and of the spinal needle and stylet.
Place sterile drapes around the site.
Place a wheal of anesthetic at the needle-entry site using a 25-gauge needle and then anesthetize deeper in the soft tissues along the anticipated path of needle insertion.
Insert the spinal needle
Fully seat the stylet in the spinal needle whenever the needle is advanced or withdrawn.
Hold a beveled spinal needle with the bevel facing the patient's right or left side (ie, facing up for a patient in the lateral decubitus position) to ensure that the sharp part of the needle goes between the longitudinal fibers of the dura rather than cuts through them. The needle can be held with one hand, but holding the needle with 2 hands gives better control in case the patient moves or jerks.
Palpate the iliac crest and spinous processes to reconfirm the insertion site.
Insert the needle pointing toward the umbilicus, roughly 15° cephalad, and advance it in small increments of about 2 to 3 mm. A pop may be palpable as the needle pierces the ligamentum flavum (to enter the epidural space) and sometimes when the needle pierces the dura (to enter the subarachnoid space). In children, such pops are usually less apparent. Often the needle needs to be advanced for much of its length before reaching the subarachnoid space. Remove the stylet between incremental needle advances to check for CSF flow (indicating access to the subarachnoid space); reinsert the stylet before continuing to advance the needle.
If the needle meets bone, withdraw it to the subcutaneous level, point it more cephalad and then reinsert it. Make sure the needle is directed toward the spinal canal, and not off to one side.
If blood returns with a deep insertion, the needle may have entered the venous plexus on the ventral side of the cord. Withdraw the needle in successive small (eg, 1-mm) steps, checking for CSF return with each step.
The needle tip sometimes is blocked by nerve roots or other tissue. If CSF is not obtained despite what seems to be successful penetration of the subarachnoid space, turn the needle 90° and recheck.
Once the subarachnoid space is reached, reinsert the stylet and do not advance the needle further.

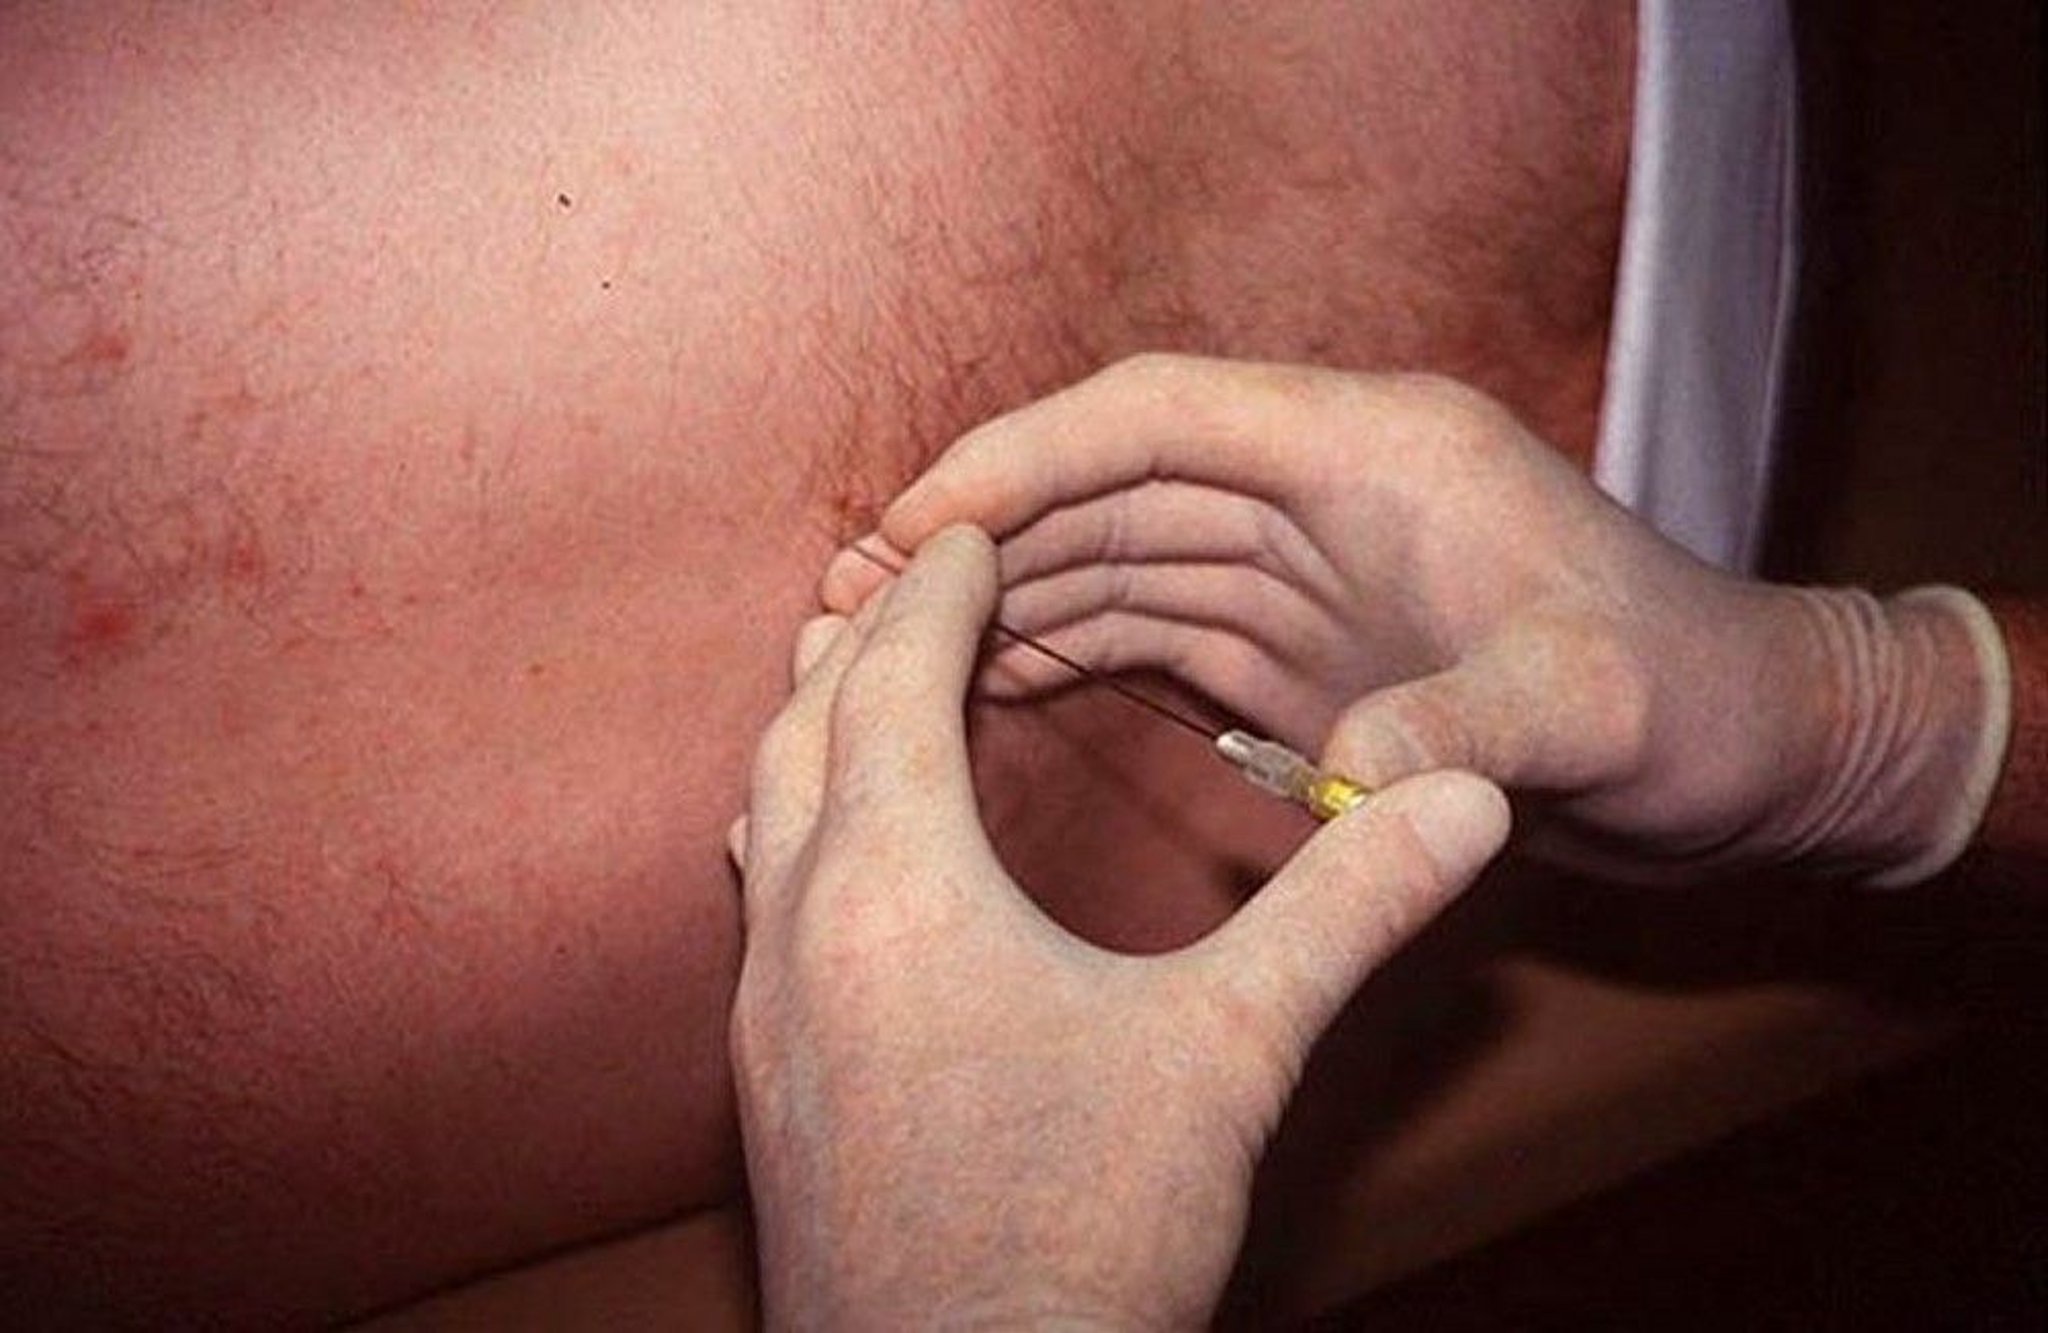
Image courtesy of John Greenlee, MD.
Lumbar Puncture
This lumbar puncture is done with the patient in the lateral decubitus position and the lumbar puncture needle inserted at the L3-L4 interspace. |

Measure CSF pressure
Manometry is usually done but can be omitted if patients are critically ill and should be omitted for patients in the sitting position because these measurements are unreliable.
Remove the stylet from the spinal needle.
Attach the assembled manometer/stopcock/extension tubing to the needle.
Hold the manometer level with the spinal needle.
Open the stopcock.
CSF will rise in the manometer tube to a height representing the opening CSF pressure, which is read on markings on the tube. The CSF meniscus should fluctuate slightly with respirations. Normal height of the fluid column (CSF pressure) is 7 to 18 cm.
If the pressure is low, instruct the patient to gradually straighten the legs at the hip and knee joints a bit to improve CSF flow. If there is no variation in pressure with respiration, particularly if the pressure is low, rotate the needle 90° to relieve possible obstruction by a nerve or if the needle is not completely in the subarachnoid space.
Collect CSF
Never aspirate CSF fluid.
If CSF manometry has been done, drain the CSF from the manometer into the first collection tube. When the manometer has emptied, remove the manometer.
In numerical sequence, allow about 1 to 2 mL of CSF to drip into each of the 4 collection tubes. Greater volumes (up to 30 to 40 mL) may increase the yield for some tests, such as detection of acid-fast bacilli, fungi (eg, Cryptococcus neoformans, Coccidioides immitis), or carcinomatous meningitis.
Do cell count and differential on the first and third tubes so that counts can be compared if red blood cells are present. (A sharp decrease in red blood cell count from the first to the third tube is consistent with a traumatic puncture.)
Do other tests, including protein and glucose levels, oligoclonal bands (if needed) and microbiologic testing, from the second tube and, if necessary from CSF that remains from the first and/or third tube.
Consider freezing the fourth tube in case additional, unanticipated studies later become necessary. Check with the lab to see how long it holds specimens, and ask them to hold the sample for a longer period of time if needed.
Conclude the procedure
Reinsert the stylet into the needle, being careful not to insert it completely. (Because nerves may drift into the needle opening, complete stylet insertion could shear off nerve tissue.)
Gently withdraw the needle.
Apply an adhesive dressing.
Aftercare for Lumbar Puncture
Bedrest after lumbar puncture is unnecessary and does not reduce the incidence of post-lumbar puncture headache; however, recumbency remains helpful in treating post-lumbar puncture headache.
Instruct the patient to be vigilant for persistent or worsening back pain, which may occur up to several days after the lumbar puncture and requires prompt evaluation to exclude hematoma.
Warnings and Common Errors for Lumbar Puncture
Be sure to keep the patient's hips, back, and shoulders precisely perpendicular to the bed.
When using the lateral decubitus position, maintain the patient's tightly curled fetal position.
Be sure to direct the needle toward the midline (not angled to one side) and slightly cephalad.
These errors make it difficult to enter the spinal canal. In addition,
Do not withdraw the needle without reinserting the stylet.
If the spinal canal is not entered, do not try to reposition the needle by moving the tip to one side or another; this can damage tissue. Instead, withdraw the needle nearly to the skin surface (ie, outside of the spinal ligament) before changing the angle and direction of insertion.
Tricks and Tips for Lumbar Puncture
Seat yourself comfortably close to the patient before doing the procedure in the lateral decubitus position.
Consider holding the needle with both hands to obtain better control.
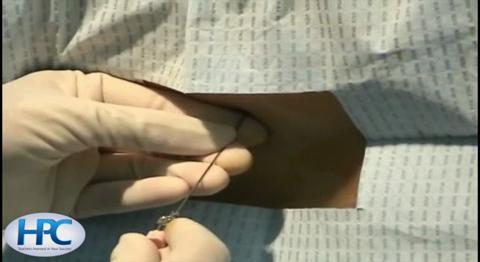
Avoid inserting the lumbar puncture needle through a skin infection or tattooed skin because of risk that infection could be introduced or the theoretical possibility that tattoo ink could be introduced into the CSF and cause irritation or toxicity. If necessary, either use an adjacent interspace or make a small stab incision through the tattooed epidermis with a scalpel and then introduce the needle through the incision.
After the needle is through the skin and into the spinous ligament, recheck the patient's alignment (hips perpendicular to bed) and direction of the needle (perpendicular to spine) before inserting further.
CSF flow may be facilitated by turning the fully inserted needle 90° (so that the bevel faces cephalad). If this is done, rotate the needle back to the parallel position before removing the needle to avoid tearing dural fibers.
Draw blood to measure glucose level before (eg, by up to 30 minutes) lumbar puncture so that level can be accurately compared with the CSF glucose level. With this timing, serum and CSF oligoclonal bands can be compared also.
If lumbar puncture is unsuccessful in the decubitus position, try the sitting position, which may be successful because of increased spinal flexion and intervertebral space opening.